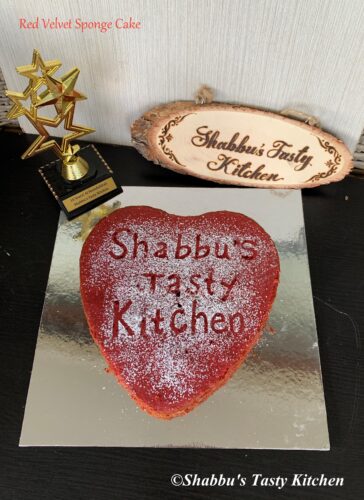
Alhamdulillah …..My blog turns 10 today !!! Back in 2012 when I started, I never imagined that I could reach such a huge milestone. Trying new recipes and posting them here has become one of the things I am most passionate about. Although it has been a bumpy ride, I was able to reach this achievement with the constant support of my family. A huge shoutout to my brother Sabith, who is the backbone of this blog, inspiring me, constantly motivating me and making sure that everything runs smoothly.
Thank You everyone for all of your support through these years…

Ingredients:
1 cup plain flour
1 tbsp cocoa powder
1 tsp baking powder
1/2 cup milk
2 tsp vinegar
2 large eggs
1/2 cup sugar
1/2 cup oil
1 tsp vanilla essence
1 tbsp red food colour
icing sugar, for decorating
Preparation:
- Preheat oven to 180 degree celcius. Butter or spray a cake pan and line the bottom with baking paper or parchment paper.( I used heart shaped pan).
- In a bowl, add milk and vinegar and mix well. Keep it aside.
- Sift together plain flour, cocoa powder and baking powder in a bowl and keep it aside.
- Separate yolk and whites of the eggs in separate bowls.
- Add egg whites in a large bowl and beat well on medium speed.
- Add sugar to this in 3-4 batches and beat well until stiff peaks form.
- Then add egg yolks and beat again until well combined.
- Add prepared buttermilk (milk mixture) and beat for a minute.
- Add oil to this and beat until combined.
- Add vanilla essence and red food colour and beat until well combined.
- Add flour mixture in 4-5 batches and lightly mix with the spatula.
- Pour the batter into prepared cake pan and tap well.
- Bake it in the preheated oven for 25 -30 minutes or until the toothpick inserted in the centre comes out clean.
- Cool for 10 minutes, then turn out onto a wire rack to cool completely…

For decorating the cake:
- I wrote my blog name in bubble writing on a paper and cut it out.
- Then I placed the letters on top of the cake as shown below…

3. Sprinkle icing sugar on top using a small strainer.

4. Carefully remove the letters from the cake…

5. Cut the cake and enjoy….


